This proactive measure can prevent frozen pipes, improve energy efficiency, and save you money in the long run. This guide will cover everything you need to know about insulating pipes for winter, from choosing the right materials to step-by-step installation instructions, so you can keep your home safe and warm all season long.
1. Choose the Right Insulation Material
Choosing the right insulation material is crucial to ensure maximum protection and efficiency. The market offers several options, each suited for different needs:
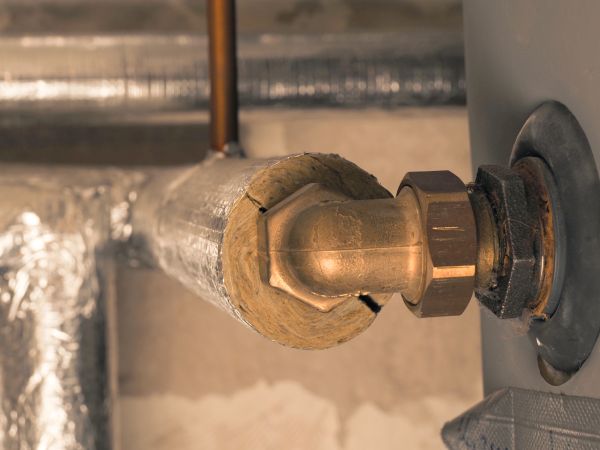
- Mineral Wool Thermal Insulation: This solution is highly effective, particularly for pipes in high-temperature environments or industrial applications. The superior thermal resistance of the mineral wool thermal insulation, combined with its non-combustible and moisture-resistant properties, makes it a reliable choice for long-term pipe protection in extreme conditions.
- Foam Pipe Insulation: These are the common choice for residential use. It is lightweight, pre-slit for easy installation, and cost-effective, making it ideal for quick DIY projects.
- Fiberglass Pipe Wrap: These are better suited for pipes exposed to high temperatures, such as those connected to boilers or hot water systems. While installation takes more time, they provide excellent thermal resistance.
- Rubber Insulation: This durable and flexible material is perfect for pipes that experience frequent expansion and contraction. It also offers protection against condensation and freezing.
- Heat Tape or Heat Cables: These are great options for extremely cold climates where traditional insulation may not be sufficient. These cables generate heat and are combined with insulation to provide added protection.
Selecting the right material ensures your pipes are protected against freezing while optimizing energy efficiency, ultimately saving you money in the long run.
2. Identify Pipes That Need Insulation
The first step in insulating your pipes is identifying which ones are most vulnerable to freezing and energy loss. Pipes located in unheated or poorly insulated areas—such as basements, attics, crawl spaces, garages, and exterior walls—are at the greatest risk. Pay particular attention to water supply pipes, as they are more likely to freeze and burst in cold weather. Pipes running near drafty windows, doors, or vents should also be prioritized.
3. Measure and Cut Insulation
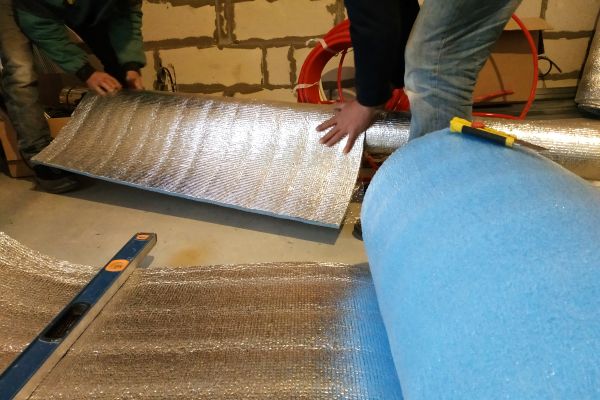
Accurate measurement is critical to ensuring proper installation and minimizing material waste. Use measuring tape to determine the diameter and length of your pipes. These measurements will help you purchase the correct type and amount of insulation. Once you have the material, cut it to fit each pipe section precisely. For foam insulation, ensure the pre-slit opening aligns with the length of the pipe for a snug fit.
4. Clean and Prepare the Pipes
Before applying insulation, it is essential to clean and dry the pipes thoroughly. Dust, grease, or moisture can cause the insulation to slip or reduce effectiveness over time. Use a clean, dry cloth to wipe down the pipes and remove debris. This step is crucial for outdoor or older pipes that may have accumulated dirt or rust. Preparing the pipes improves the adhesion and fit of the insulation and helps extend its durability, ensuring that your efforts last through the harshest winters.
5. Apply the Insulation
The process of applying insulation depends on the material you’ve chosen:
- For foam insulation, open the pre-slit section, snap it over the pipe, and press the edges together to form a tight seal. Use adhesive tape, zip ties, or pipe straps to secure the insulation, especially around bends or joints.
- When using fiberglass wraps, start at one end of the pipe and wrap the material tightly, overlapping each layer slightly to eliminate gaps. Secure the wrap with duct tape or metal ties to prevent it from unraveling.
- For rubber insulation, slide it onto the pipe and seal the seams with adhesive or insulation tape to create a continuous barrier.
- If using heat tape or cables, follow the manufacturer’s instructions carefully to ensure safety. Attach the heat tape to the pipe and cover it with insulation to protect against freezing.
Covering every inch of the pipe, including tricky areas like joints and corners, ensures that your pipes are well-insulated and protected.
6. Seal Gaps and Joints
Once the insulation is applied, turn your attention to gaps and joints, often weak points in the system. Use insulation tape, pipe wrap, or sealant to cover these areas, ensuring no exposed sections. Pay special attention to bends and connections, as these are more susceptible to heat loss and freezing. Sealing all gaps creates a continuous insulating layer, improving the effectiveness of the system and preventing cold air from seeping in.
7. Inspect and Maintain Insulation
Even the best insulation requires regular inspection to remain effective. Check your pipes periodically throughout the winter to ensure the material is intact and securely in place. Look for signs of wear, such as cracks, loosened sections, or moisture buildup, and repair them immediately. Promptly replacing damaged insulation prevents minor issues from becoming more significant problems. Regular maintenance ensures that your pipes stay protected, your heating system operates efficiently, and your energy savings continue throughout the season.
Conclusion
By insulating your pipes, you’re protecting your home from costly damage and making a smart investment in energy efficiency. With a little effort and the right materials, you can significantly reduce heat loss, lower your energy bills, and enjoy peace of mind knowing your plumbing is prepared for winter’s challenges.


